While a post on formatting type isn’t as sexy as one on photography, it is just as useful to you self-publishers out there, so read up!
Today I’m giving you some simple InDesign tips on how to use typography to make your pattern instructions more functional and professional looking. I’ve noticed that there are 3 characters that often get overlooked by self-publishers and while the pattern instructions aren’t incorrect, readers have an easier time reading the text if some (or all!) of these tips are used. Let’s talk about inch marks, multiplication symbols and fractions.
Inch Marks
Now, inch marks aren’t going to make or break your pattern copy, BUT if you’re looking to get your patterns looking polished, converting your quotation marks to inch marks is one easy way to do this.
Simply select the quotation mark and type and hold SHIFT + OPT + G on your keyboard. The quote mark will change to an inch mark.
PRO TIP: Do a Find/Replace and automate the conversion process. Be sure to double-check any text where you are intentionally using quotation marks, they will convert to inch marks if you go the Find/Replace route.
Multiplication Symbol
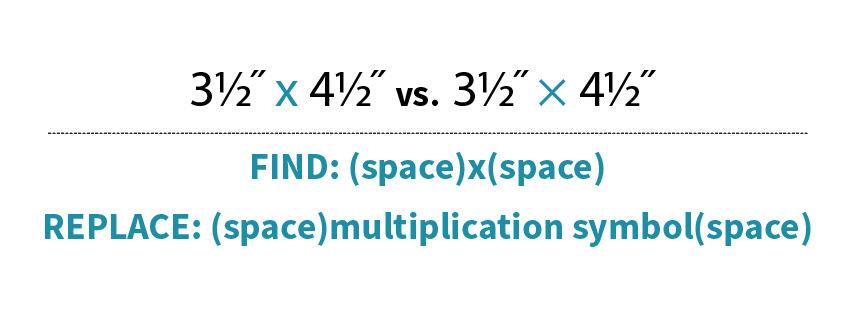
This one might seem really nit-picky, but hey, I’m a book designer, what do you expect?! One quick way I can tell if a pattern was thoughtfully designed is if multiplication symbols are used instead of a lowercase ‘x’. Not only does it give your layout some street cred, but using multiplication symbols help make the measurements easier to read.
Here’s how to do it: Highlight the ‘x’ In the text that you’d like to convert to a multiplication symbol. Then, go to the Glyphs panel and click the dropdown next to ‘Show’. Select ‘Math Symbols’, find the multiplication symbol and double-click to replace your ‘x’.
You could do this manually throughout your layout, but why? Simply do a Find/Replace being sure to include the spaces before and after the Find/Replace otherwise you’ll just replace all of the x’s in your document with multiplication signs and that’s not cute, trust me.
Fractions
Fractions: Everyone’s favorite kind of character to ignore. We all know we should format them, but they’re such a paaaaain! Right? Well, yeah, but they don’t have to be that big of a deal. Thankfully InDesign and OpenType fonts have made them easier to deal with.
First, confirm that the font you are using is an OpenType font. This will give you access to many type capabilities, including automatic fraction formatting. Once you know that you are working with an OpenType font, simply highlight the numbers and backslash that are included in the fraction. InDesign will convert the numbers to a numerator, fraction slash and denominator. I included a video because after years of hand-formatting, watching these fractions format before my eyes still feels like magic to me!
I hope that I’ve shared some knowledge with you here! Of course there are other, even more automated ways to do some of these things and I’m headed in that direction. First, though, I like to show how to manually do these things because it’s just good knowledge to have…like driving a manual car, it’s good to know how to do it even though there is an easier way.
Happy designing!
+ Kristy


